


Macro Lens Guide for Closeup Photography
Did you know all the ways you can use a macro lens? These 12 pro tips will give you an insight into the wonderful world of close up photography.
Used for ultra-detailed photography, a ‘macro lens’ is surprisingly versatile – you’ll soon discover it’s not just about capturing close-up images.
The range of subjects is vast; insects, flowers, textures, water droplets and, perhaps less obviously, portraits, and all in tack-sharp detail.
In this guide, we’ll be discussing all the technical things you need to know, from minimum focusing distances to magnification ratio, and taking a closer look at what a true macro lens can offer you.
We’ll also offer our recommendations on great value macro lenses from Nikon, Canon and third party brands.
So, let’s get started!
What is a Macro Lens?
Macro means large, and in photography, a macro lens is one which brings objects very close and into sharp focus. A macro lens makes small objects or parts of objects much bigger on the camera sensor.
So, macro means to focus and scale. But there’s more to a macro lens than just that. Images photographed with a macro lens are often shown – printed, on-screen or projected – so the subject is above life-size but still fascinating beyond human eye levels of detail.
A typical macro lens has a ‘magnification’ or ‘reproduction ratio’ of 1:1, meaning the image on the sensor is the same as the real object. With other lenses, the image on the sensor is much smaller than the tree, person or building you focussed on.
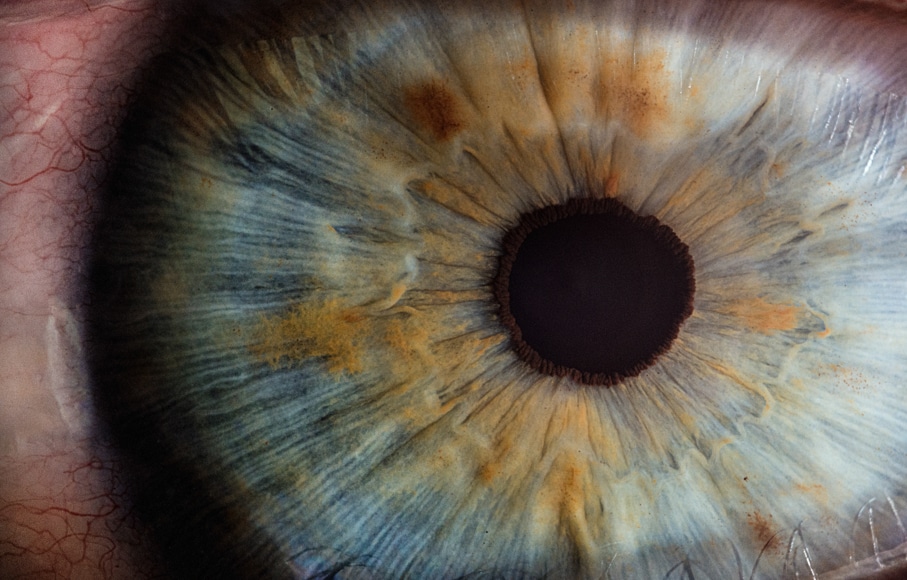
Some macro lenses have a ratio of more than 1:1, enabling them to record images on the sensor that are larger than the object in real life. You will have seen photographs of insect eyes or wings or snowflakes, for example.
The minimum focusing distance varies with lenses but typically 12 inches (30 centimeters) or less, but most macro lenses will reach infinity, making them useful for general photography.
You can even get macro lenses for iPhones or other smartphones, which attach via a clip over the existing camera’s lens.
- What is a Macro Lens used for?
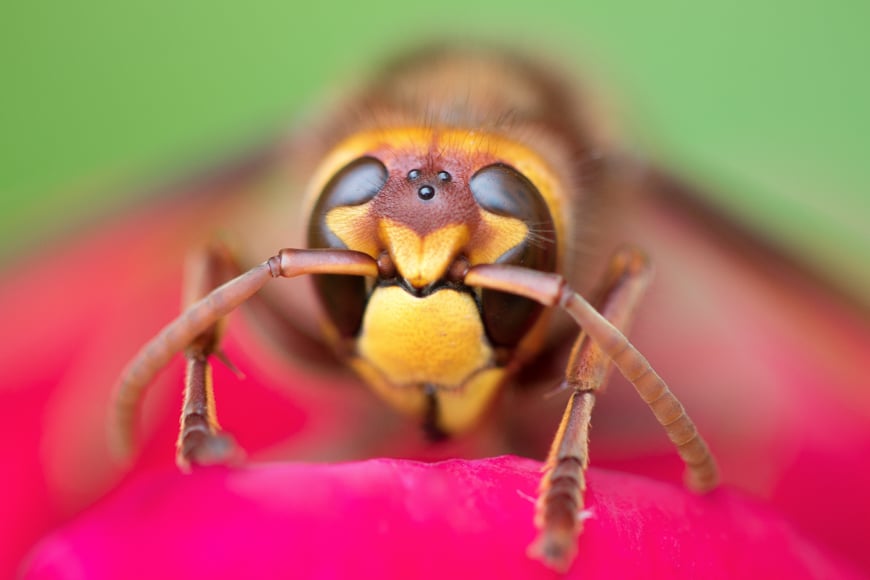
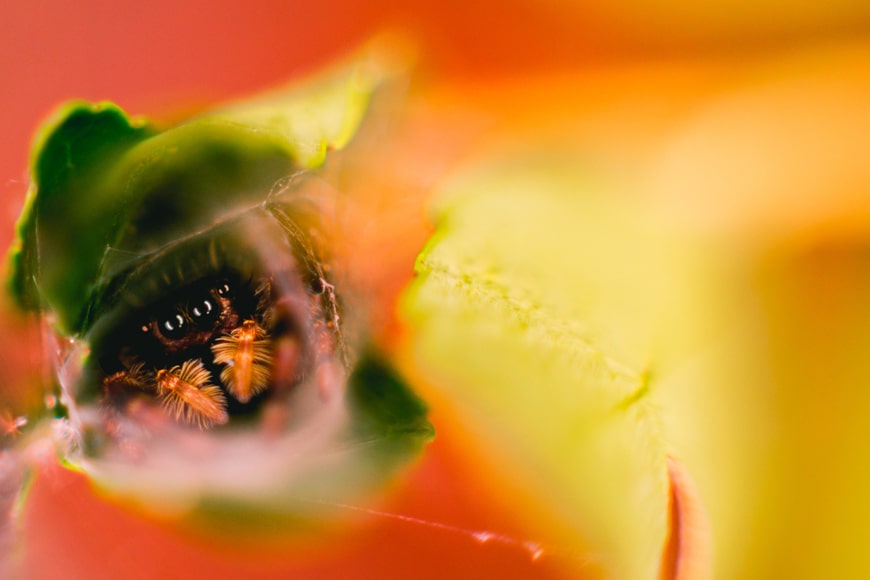
Macro lenses are used for shooting close-ups. A macro lens can be used to capture images beyond human vision. A macro image of an insect, for example, can reveal the texture on its back and luminescent colours which in real life is not much more than a blur.
Many believe that macro lenses aren’t all that versatile, but that’s really not the case. First off, it’s a great lens for newborn photography, especially when photographing tiny details like the baby’s eyelashes, fingers, or toes.
It’s also a great lens for product photography, especially if you’re dealing with smaller products.
Your macro lens can also be used as a portrait lens. It actually works well for portraiture because it captures amazing detail, allows you to achieve correct focus even when you stand very close to the subject, and comes in focal lengths that are also ideal for portraits.
So macro lenses can be extremely important for scientific studies, particularly of nature including images of insects, flowers and butterflies. You can also use this style of photography for artistic means, such as telling close-ups; baby fingers, people’s eyes with reflections, older hands with wrinkled skin.
- What is the difference between a Micro and a Macro Lens?
In the simplest of terms, macro translates as big and micro means small. Macro photography aims to make small things appear big on your sensor – micro photography is more about capturing very detailed images.
For you though, when selecting a lens for close up photography, it can be a little confusing – Nikon has micro lenses, but all other camera companies call these lenses macro lenses!
So if you’re a Nikon user, you may be looking at micro lenses, for other camera brands you’ll be looking at macro lenses.
- What is the magnification on a true macro lens?
A ratio of 1:1 is needed to achieve the best and most true results in macro photo taking. However, some macro lenses do have a magnification ratio of 1:2 and 1:3.
What is the best focal length for a macro lens?
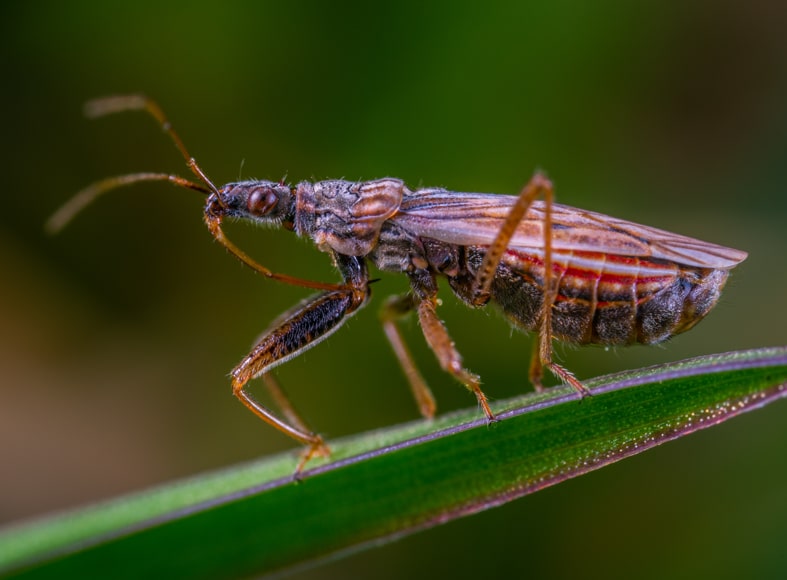
Credit: Егор Камелев
The focal length of a macro lens makes a big difference to the images you take. Here we take a look at the different focal lengths of macro lenses to help you decide which one would best suit your photography.
- 40-60mm
40 to 60mm macro lenses are perfect for capturing product photography. Also, it’s ideal for getting really close to small subjects – for instance, small creatures.
But it really does come into its own when shooting inanimate objects.
- 90-105mm
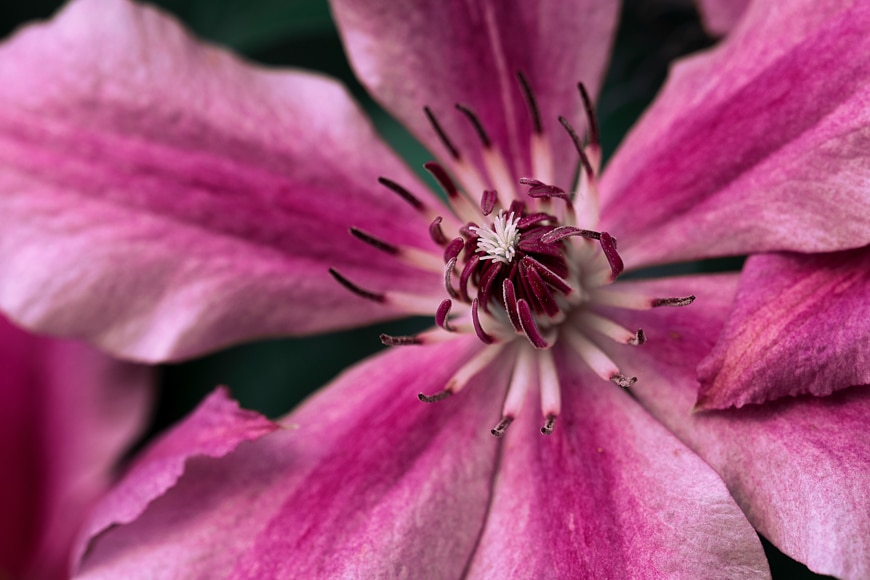
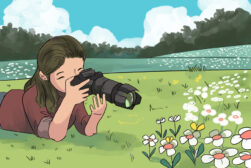
The 90mm to 105mmm macro lens is a classic macro focal length. When you think of macro photography, you will no doubt think of small animals, flowers and insects – as well as plants. This focal length is perfect for all of these subjects.
The focal length means you don’t need to get too close to the subject (i.e. your working distance can be greater), but it is still versatile. After all, it’s a macro lens so you can get very close if you need to! It’s also a popular choice when taking an eye close-up photo.
- 150-200mm
This really is the ideal focal length if you can’t get too close to your subject. Having a greater working distance can be helpful, when, for example, you may be worried that you’ll scare a small insect you’re photographing away.
So this longer focal length will allow you to step back while still taking very detailed images, that appear close to the subject.
12 Tips to Get the Most out of a Macro Lens
Here we cover 12 tips for you to use to take beautiful macro photographs – by the end of this handy list, you will be ready to go!
1. Stabilize your Shot
Credit: Hamish Secrett
For effective macro photos, you will want to ensure you take steady shots with a sharp focus. The closer you get to your subject, the more noticeable camera shake is – and camera shake is something to avoid at all costs with macro photography!
Usually, putting your shutter speed up high would be enough to compensate for any camera shake – high shutter speeds means sharp, steady shots.
However, with macro photography, when you are so close to the action, the slightest movement can throw your image out of focus.
You may also be shooting at very high apertures to capture maximum detail across the frame, meaning if you put your shutter speed up along with a high aperture, you may have to compensate by putting up your ISO. Even with noise reduction in editing, high ISO can lead to degradation in image quality.
So to stabilise your shot, we recommend two options. First of all, your macro lens or camera body may have image stabilisation built-in. In which case – switch it on!
Image stabilisation (or vibration reduction) works really effectively and will allow you to lower your shutter speed while still taking steady shots. Though very effective, it will never quite compete with using a tripod though.
For the steadiest shot – and the ability to shoot with a slow shutter speed with a narrow aperture – a tripod will always win out. They can be cumbersome to carry around so sometimes it’s not possible to use them.
But where possible, we highly recommend using a tripod – here are some lightweight travel tripod options.
Just remember to turn your image stabilisation off on your camera or lens when shooting with a tripod, as this can have an adverse effect otherwise.
2. Choosing the right light
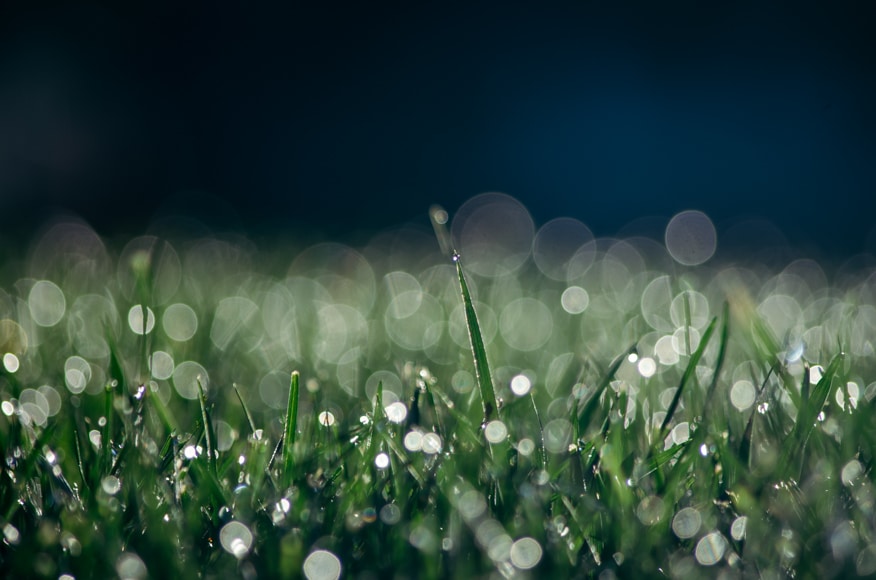
Credit: Andrew Seaman
All types of photography require the photographer to consider the light available when composing a shot and picking the right settings – and if there isn’t the right available light, sometimes artificial light is needed.
With macro photography, this is no different. Indeed – it can be challenging to ensure the right light is available.
Macro photography requires a lot of light! You need narrow apertures – for example, you may choose to shoot at f/18 – to maintain sharpness across the focal plane.
Outside, when shooting macro nature images, natural light can be very effective. But when working with nature, the photographer is always dependent on so many variables beyond their control – mainly the weather.
Then, of course, there is the time of day and time of year – all of these affect the quality of light and how long it will be available to you.
Backlighting can look beautiful in macro photos – shoot nature macro at sunset to have sunlight filtering through the tree leaves, for example.
When shooting macro, be aware of the kind of lighting you will be shooting in and pick wisely to achieve the results you are looking for. And if you need to introduce artificial lighting, there are some suggestions below.
3. Use a ring light for macro photography
Sometimes available light is not enough. Luckily, there are some affordable artificial solutions to assist you in taking effective macro photography.
You can buy ring lights that fit on the end of your lens, and they provide a continuous light source. A ring light won’t give you powerful lighting as a flash will, but it can be very effective.
Artificial lighting can reflect off shiny surfaces, so if directly lighting a subject, this is something to be aware of.
4. Use the right aperture
Credit: Luke Braswell
When you are very close to a subject, this puts unavoidable limitations on the depth of field in your image – the minimum focus distance of some macro lenses is short, so you may find yourself very close to your subject.
Most of the time you will probably be looking at a narrow aperture to get more of your subject in focus – so stop down (i.e. make the f-stop of your lens a larger number).
It’s also important to get most of your subject on the same focal plane to keep the image sharp.
So stop down to f/18 and angle your image, so the subject is on the same focal plane to avoid part of the image looking soft.
5. Try focus stacking
Credit: Timothy Dykes
Many cameras have a focus stacking option – Olympus originally pioneered this, but now Nikon and Canon and other brands offer the same feature.
Automatic focus stacking enables you to combine different images – each with different focus distances.
This can be done manually but is much easier in a camera like a Nikon D850. Then you can use Lightroom to help you combine the images when editing – here’s a guide.
The final image will give you an ultra-sharp, in-focus image.
6. Choose your subject wisely
With macro photography, you will, of course, want to get close. But some subjects, such as insects and other small animals, may move away before you can click the shutter.
If you are aiming to photograph fast-moving subjects, consider photographing them later in the day, as they start to move slower as night gets closer.
Of course, choosing a non-moving subject to begin with is probably wise! As you get more confident, you can try photographing insects and other small animals.
The ultimate achievement is to be able to get your macro lens close enough to capture something small and normally fast-moving, such as a dragonfly!
7. Be aware of your minimum focus distance

Credit: Tj Holowaychuk
You will see on your macro lens that you can select the focusing distance for your subject when using autofocus. Make sure you select the right one – otherwise your autofocus will never lock onto your focal point.
You may find that manual focus works best when you have the time to set up a tripod, and we discuss this below. But sometimes, you don’t have the time for this – you need to get the image quickly before your tiny subject flies away for instance!
In these cases, autofocus is a must and therefore, it’s important to know how to best utilise autofocus with your macro lens.
Practice before you head outside so you know your minimum focus distance, and just how close you can get to your subject.
8. Use a tripod and remote triggers for steady shots
Keeping your camera steady when taking macro photographs is very important. Since you are so close to the subject your photographing, there is no room for error.
Use a tripod so you can use timer release or remote triggers to activate your shutter. This way, you are not touching the camera directly when taking your images, and it will remove any camera shake issues.
Many macro lenses have ‘vibration reduction’ or ‘image stabilisation’ built-in – if this is the case with your macro lens, turn it off when using a tripod.
9. Use manual focus for sharp images
Credit: v2osk
As you are getting really close and looking for pixel-perfect focusing, getting your autofocus locked on can be tricky. In fact, you may find your camera searching and searching, then finding focus, then searching again!
It can be very frustrating. This is why we really recommend using a tripod, as you can take your time to adjust your focus carefully.
When shooting in manual focus on a tripod with macro lenses, another piece of advice is to use focus peaking to ensure you nail focus on your subject.
10. Use live view to help with focusing
If you use manual focus and a tripod as we recommend above, put your camera into live view mode and use that while focusing.
This way, you can carefully zoom into your focal point and really get that sharp image you are looking for.
If you have a DSLR, remember to turn live view off before shooting, since this will also help to reduce vibrations from the internal mirror movement.
11. Use a macro lens for detailed portraits
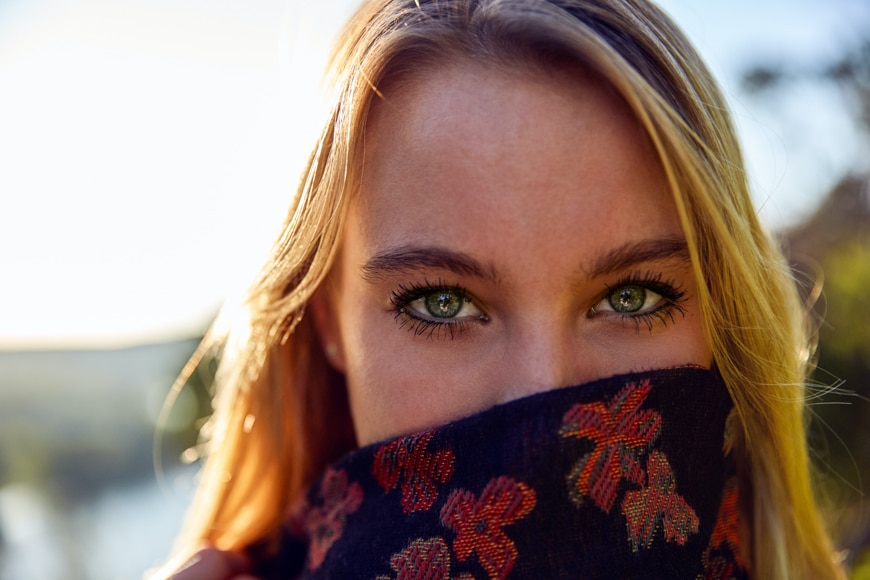
Credit: Ayo Ogunseinde
If you’ve selected a macro lens with a portrait-type focal length (say 90mm), you will find it works well for shooting portraits. But it’s not just the focal length that lends itself to portraiture.
Macro lenses are also great for headshots, with their close focusing capabilities. A macro lens is designed to render detail and colour beautifully, capturing sharp, detailed images.
Of course, you will most likely lose the shallow depth of field that other portrait lenses may offer, but a macro lens will produce extremely sharp and crisp portraits – perfect for printing.
12. If you don’t have a macro lens, use an alternative!
While you consider which macro lens to buy from our list below, some other techniques are available.
A reversing ring allows you to mount a regular lens backwards onto your camera to replicate a macro lens.
If this seems a little odd, turn a lens around without the camera and see the effect. It’s a bit awkward to use though, as all the controls and lens rings are the wrong way around!
An inexpensive alternative to a macro lens is a close-up or macro optical glass filter – a single lens you screw onto the front of a lens.
These come in various magnifications D1, D2, D3, D4 and D5. D stands for ‘diopter’ which is the optical term for the strength of the lens. To alter magnification, you change over the lens filters, which is a fiddly way of working, particularly outside.
Macro Filters work well if you have a subject – like postage stamps or badges – that you regularly photograph and have a standard set up to work with.
However, the best technique to adopt is still investing in a macro lens – so let’s look at our guide to the top dedicated macro lenses available right now to suit your budget.
Recommended Macro Lenses for all Cameras
After reading through our list of macro tips, you are probably wondering what lens to buy or even asking yourself are macro lenses are worth it?
Here’s a list of some great bang-for-the-buck options:
1. Tamron AF 90mm f/2.8 Di – this is an excellent value lens and available for many camera brands such as Nikon, Sony, Canon and Pentax. A very well established lens and the lens choice of many photographers. It’s known for producing sharp images and also has excellent vibration reduction inbuilt.
2. Sigma Macro 105mm f/2.8 EX DG OS HSM – with its wide aperture, this lens is perfect for portraits and macro photography. Extremely good value for the quality of images it gives. The sigma is a third party lens available for many different brands including Canon, Nikon and Sony.
3. Nikon AF-S 105mm f/2.8 G IF ED VR Micro – a more expensive alternative, the Nikon gives superior sharpness at the corners of the frame. It does come in at nearly twice the price of the excellent Tamron 90mm, however, so is a much bigger investment.
4. Canon EF 100mm f/2.8L Macro IS USM – with a true magnification ratio of 1:1 and inbuilt stabilisation, The Canon EF 100mm is great for macro photography for canon cameras.
5. Canon RF 85mm f/2 Macro IS STM – a mirrorless macro lens for Canon cameras, the F2 aperture makes it perfect for portraiture and close up photography.
6. Olympus M.Zuiko Digital ED 60mm f/2.8 Macro – this micro four thirds macro lens for Olympus pen cameras has dust and splashproof sealing, making it a great all-weather lens.
7. Nikon AF-S DX 85mm f/3.5G VR Micro – a more affordable Nikon macro lens in comparison to the 105mm model, the 85mm F3.5 is designed for DX (crop sensor Nikon) models and gives excellent results
8. Pentax 100mm f/2.8 SMC D-FA WR Macro – the perfect macro lens for Pentax cameras, fully weather-sealed and giving very sharp images.
9. Sony FE 90mm f/2.8 Macro G OSS – the premier Sony macro lens, is an investment lens like its full-frame Nikon and Canon counterparts.
10. Canon EF-S 35mm f/2.8 Macro IS STM – unlike the other lenses on this list, this covers a wider focal length. This 35mm macro lens can give you different results with it’s wider field of view.
Final Words
Owning a macro lens really does open up a whole new world – a microscopic world made large.
Whether you’re new to photography and looking to explore as many different types of image-making as possible, or a more experienced photographer trying a new challenge – macro lenses have something for everyone.
Most professional photographers will have a macro lens somewhere in their kit bag, whether it’s for product photography or even capturing details at weddings.
However, if you’re an enthusiast, you may be looking at experimenting with macro lenses because they enable you to present imagery so far removed from what we are used to seeing every day.
We hope this guide to macro lenses has been useful – now go out and start shooting your own close up images. If you have any questions at all, leave them in the comments below and we will get back to you.


Check out these 8 essential tools to help you succeed as a professional photographer.
Includes limited-time discounts.


Patrick Mateer is an award-winning photographer who lives in Yorkshire, England with his wife (wedding photographer Hollie Mateer) and two children.


WELCOME TO SHOTKIT
Enter your email to be sent
today's Welcome Gift:
19 Photography Tools
🔥 Popular NOW:


Shotkit may earn a commission on affiliate links. Learn more.